
EQ BACCH Binaural Microphones (BM or BM-Pros) in your DAW
To use the BM microphones in your own DAW, you simply need to load the corrective EQ for your mics. Here’s the easiest way to do so.
Loading BM corrective EQ:
Step 1: Locate the EQ files.
The EQ files are included on the thumb drive within the BM or BM-Pro case. If you plug that drive into your computer, you’ll see a folder within it that has the serial number of your microphones. I’d recommend copying that folder somewhere onto your machine.
Navigating within that folder and “Equalization Filters”, you’ll eventually see a list of files.
Step 2: Convert the mono wav files to stereo.
Now, we need to take the separate L and R mono .wav files and turn them into one stereo .wav.
This is really simple with Audacity, but you could do this within your own DAW.
Within Audacity:
Drag and drop the L and then the R file into audacity, so that the L is the top file.
Click the arrow next to the name on the top file, and select “Make Stereo Track”.

Now, select the joined track and either “Export Audio” or “Export as WAV”, just be sure to keep the files at 96kHz and 32 bit depth if possible.
Save this within your folder without the L/R designation, e.g., “BACCH-BM_Mk2_418-419_EQ.wav”.
Step 3: Load this file into a convolver.
There are many convolution plugins. Usually there is one included with your DAW. All we need to do here is load our stereo impulse response into a convolution plugin and turn off all other processing, ensuring the output is 100% wet. Let me walk you through this in Logic’s Space Designer.
Opening a new project, I’ve loaded Space Designer into my session.
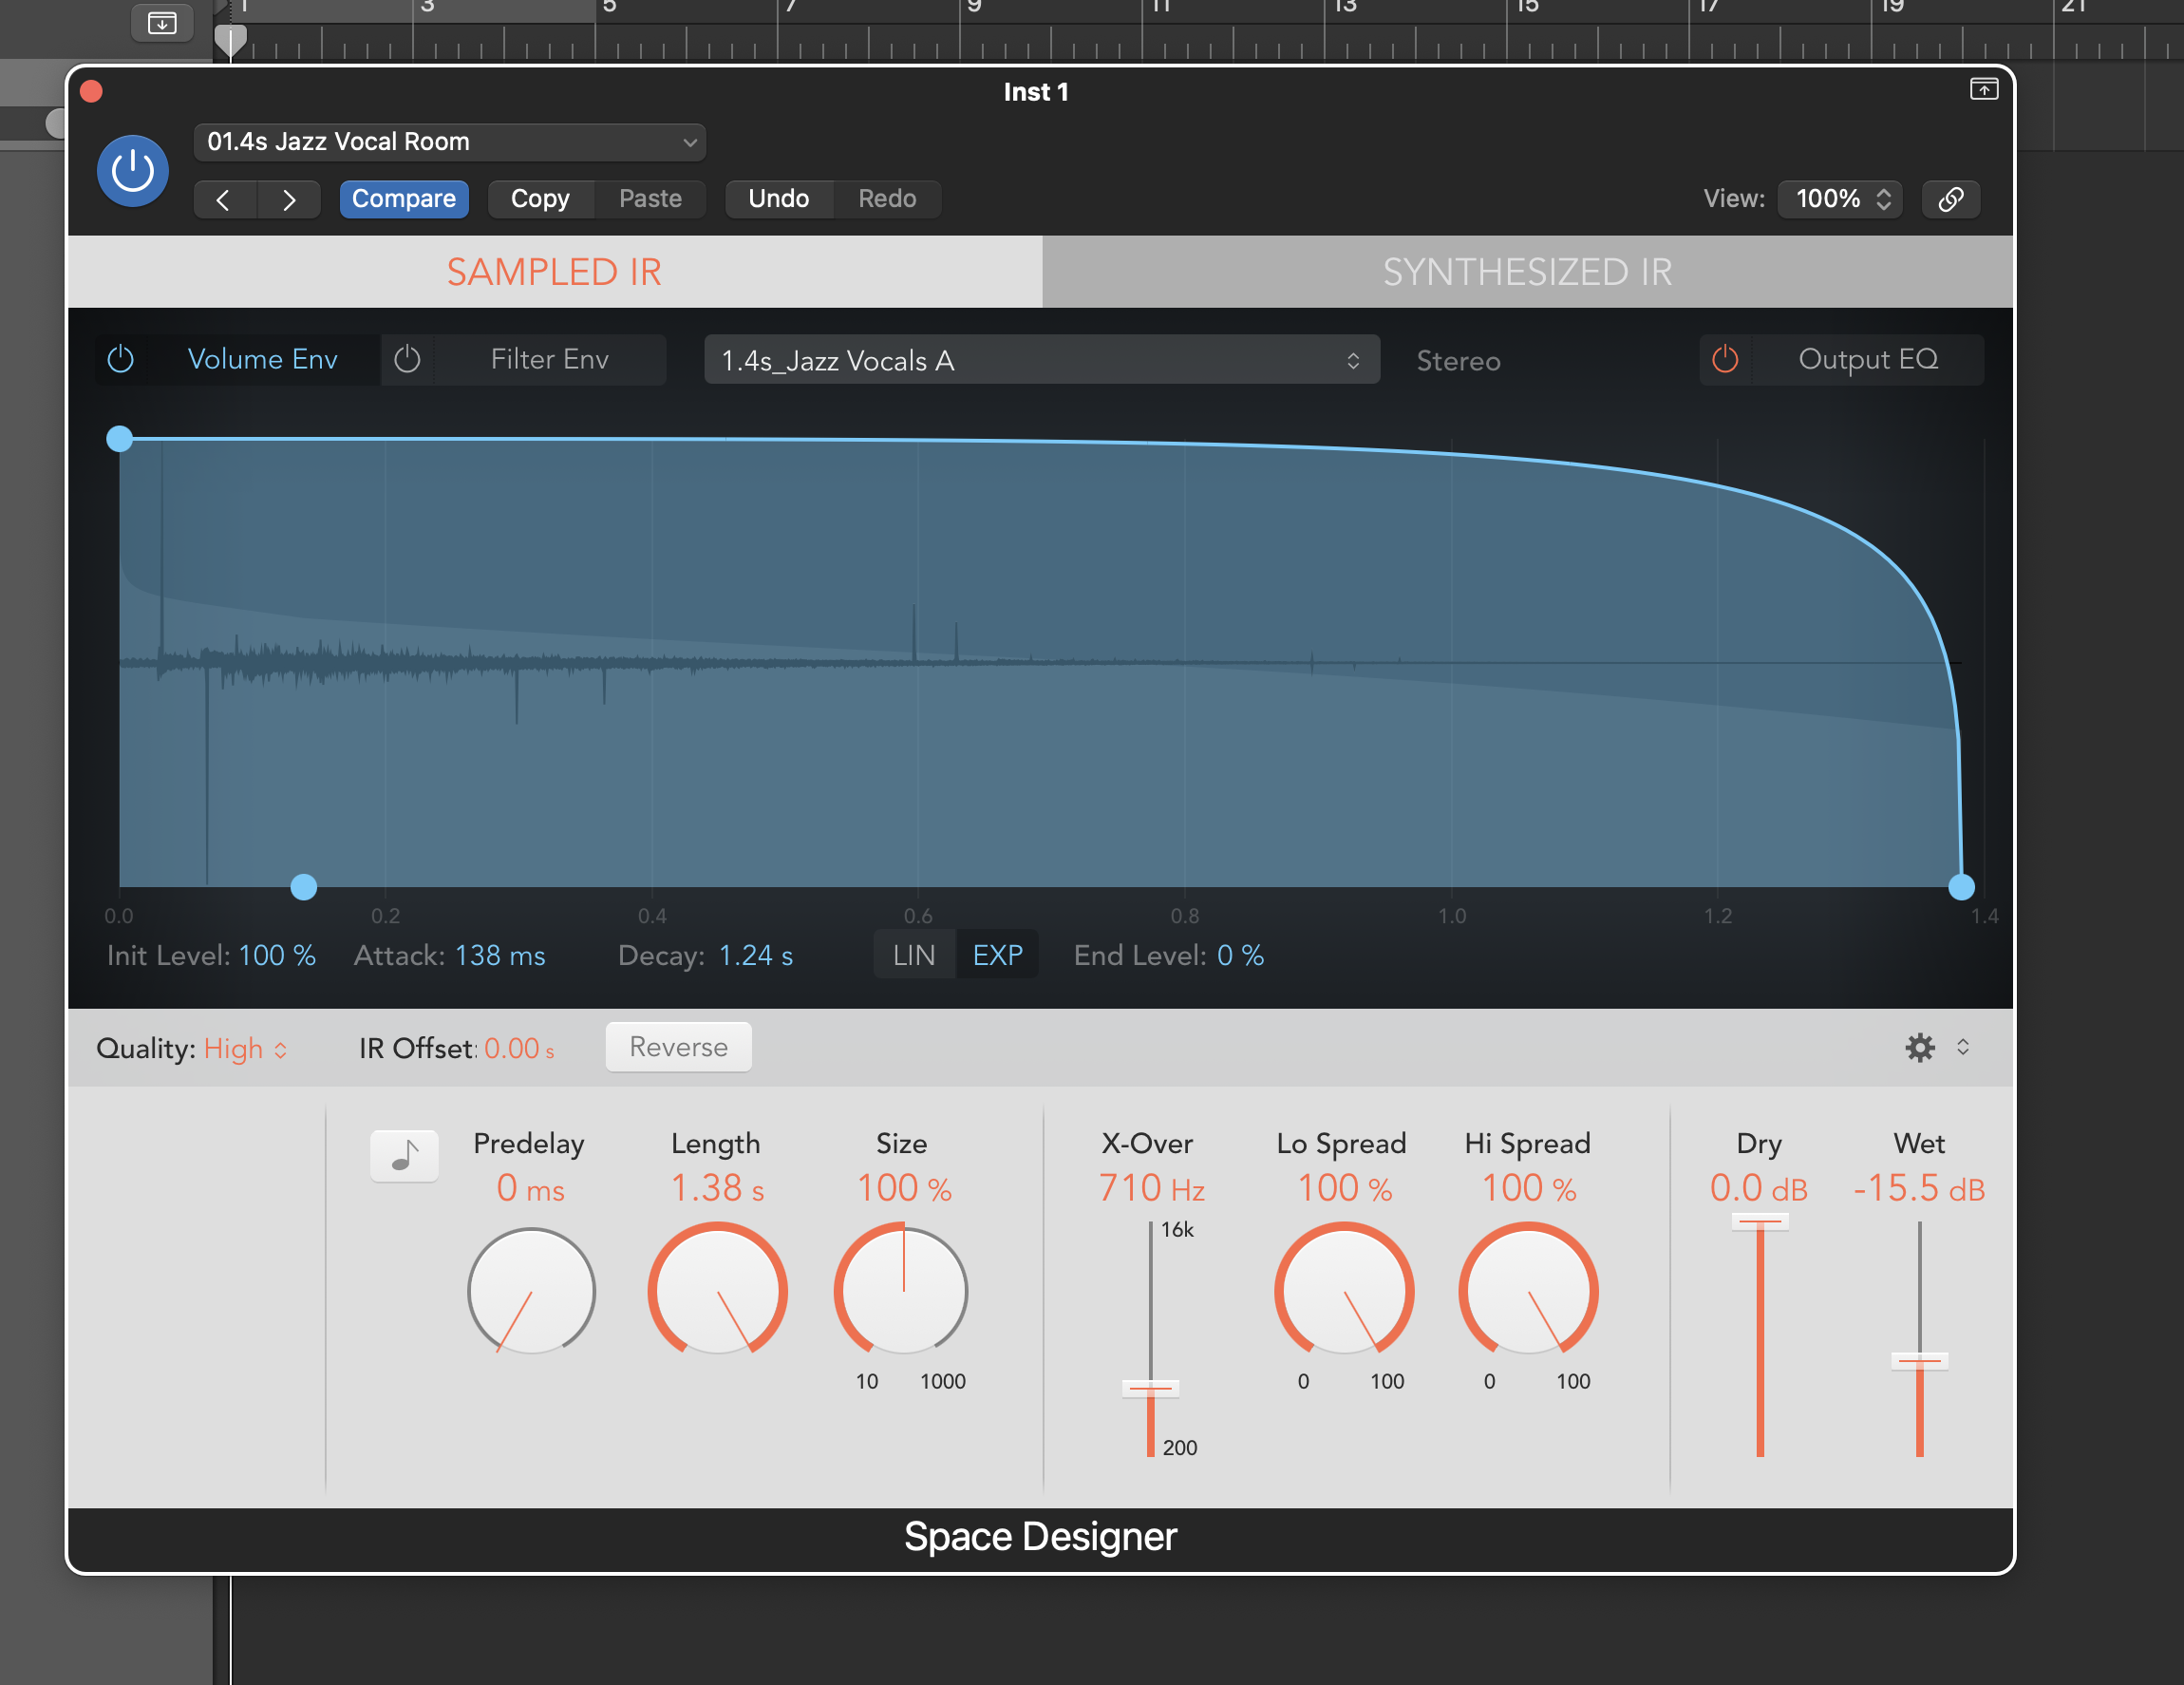
Within space designer, click the central IR panel and choose “Load IR”.

Now, navigate to the file you just created, and load it in.
Finally, we want to turn off all EQs and envelopes, pre delays, and any extra processing.
Make sure the plugin is 100% wet, in this case turning dry down to “mute” and wet up to 0.0.
Ensure the Quality is set to High, and the size and length are left at 100%.
Finally, volume compensation or normalization is a common feature of convolution engines — beware that this may slightly distort the signal at full scale. In space designer, you can see if this is active by clicking the cog in the bottom right just above the “wet” slider.

It’s okay to leave this on, but I’d recommend knocking down your wet gain a couple dB if so. If you turn it off, you will notice a decrease in volume along with the equalization change.
You can now go ahead and save this entire preset within your convolution library so it can be recalled easily.
Your final result should look something like this:

Ah, grayscale and sad, I know. No worries, as luckily this is a drag and drop playback preset. Enjoy!